> ## Documentation Index
> Fetch the complete documentation index at: https://docs.assignbots.com/llms.txt
> Use this file to discover all available pages before exploring further.
# Creating a team
# 👥 Creating a Team
Teams let you collaborate with colleagues by sharing access to bots — either as editors or viewers. Each team has its own isolated workspace.
***
### ➕ Create a Team
To create a new team:
1. Open the team dropdown in the top right
2. Click **Create New Team**
3. Enter your team name
4. Click **Create**
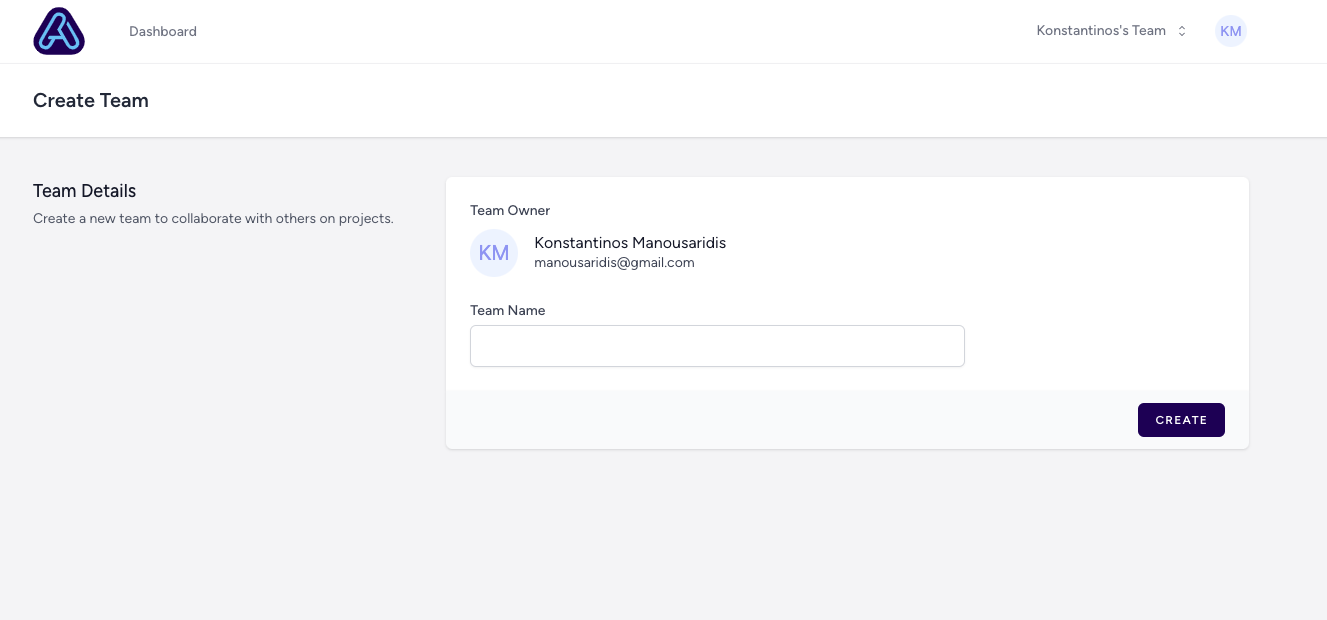 You will become the **Team Owner** and can start inviting others right away.
***
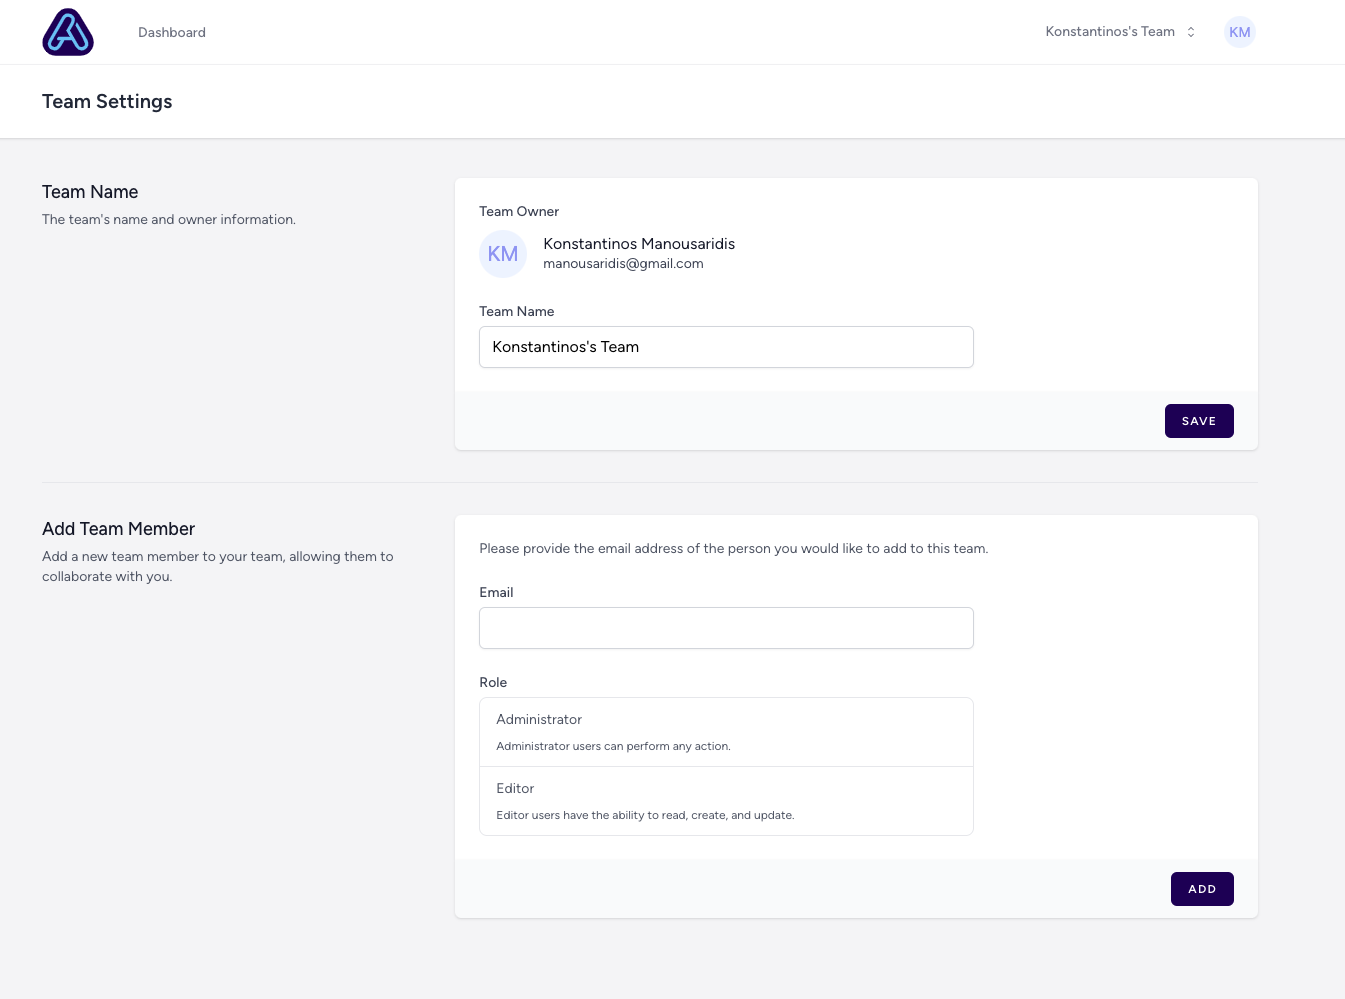
### 👥 Invite Team Members
Once your team is created:
1. Go to the dropdown > **Team Settings**
2. In the **Add Team Member** section, enter the person’s email
3. Choose a role:
* **Administrator** – full access and settings control
* **Editor** – can view, edit, and build bots
* **Viewer** – read-only access for analytics
4. Click **Add**
An email invitation will be sent. Once accepted, the user will join your team.
You will become the **Team Owner** and can start inviting others right away.
***
### 👥 Invite Team Members
Once your team is created:
1. Go to the dropdown > **Team Settings**
2. In the **Add Team Member** section, enter the person’s email
3. Choose a role:
* **Administrator** – full access and settings control
* **Editor** – can view, edit, and build bots
* **Viewer** – read-only access for analytics
4. Click **Add**
An email invitation will be sent. Once accepted, the user will join your team.
 ***
You can promote/demote or remove users at any time from the **Team Settings**.
***
### 🗑️ Delete a Team
Only the **Team Owner** can delete a team.
At the bottom of **Team Settings**, click **Delete Team**.
⚠️ This will permanently erase all bots and data under that team. Be sure to back up anything important first.
***
Use teams to keep workspaces separate across departments, classes, or institutions — while enabling collaboration with full control.
***
You can promote/demote or remove users at any time from the **Team Settings**.
***
### 🗑️ Delete a Team
Only the **Team Owner** can delete a team.
At the bottom of **Team Settings**, click **Delete Team**.
⚠️ This will permanently erase all bots and data under that team. Be sure to back up anything important first.
***
Use teams to keep workspaces separate across departments, classes, or institutions — while enabling collaboration with full control.